
San Antonio pool renovation
Find the reason your pool keeps losing water
Investigate suspected pool water loss in San Antonio before resurfacing. Review symptoms, testing scope, findings, and the next step toward repair.
Content updated
Try a bucket test before scheduling leak detection
Compare water loss in the pool with evaporation from a bucket exposed to the same conditions. This screens for a possible leak; it does not locate one.
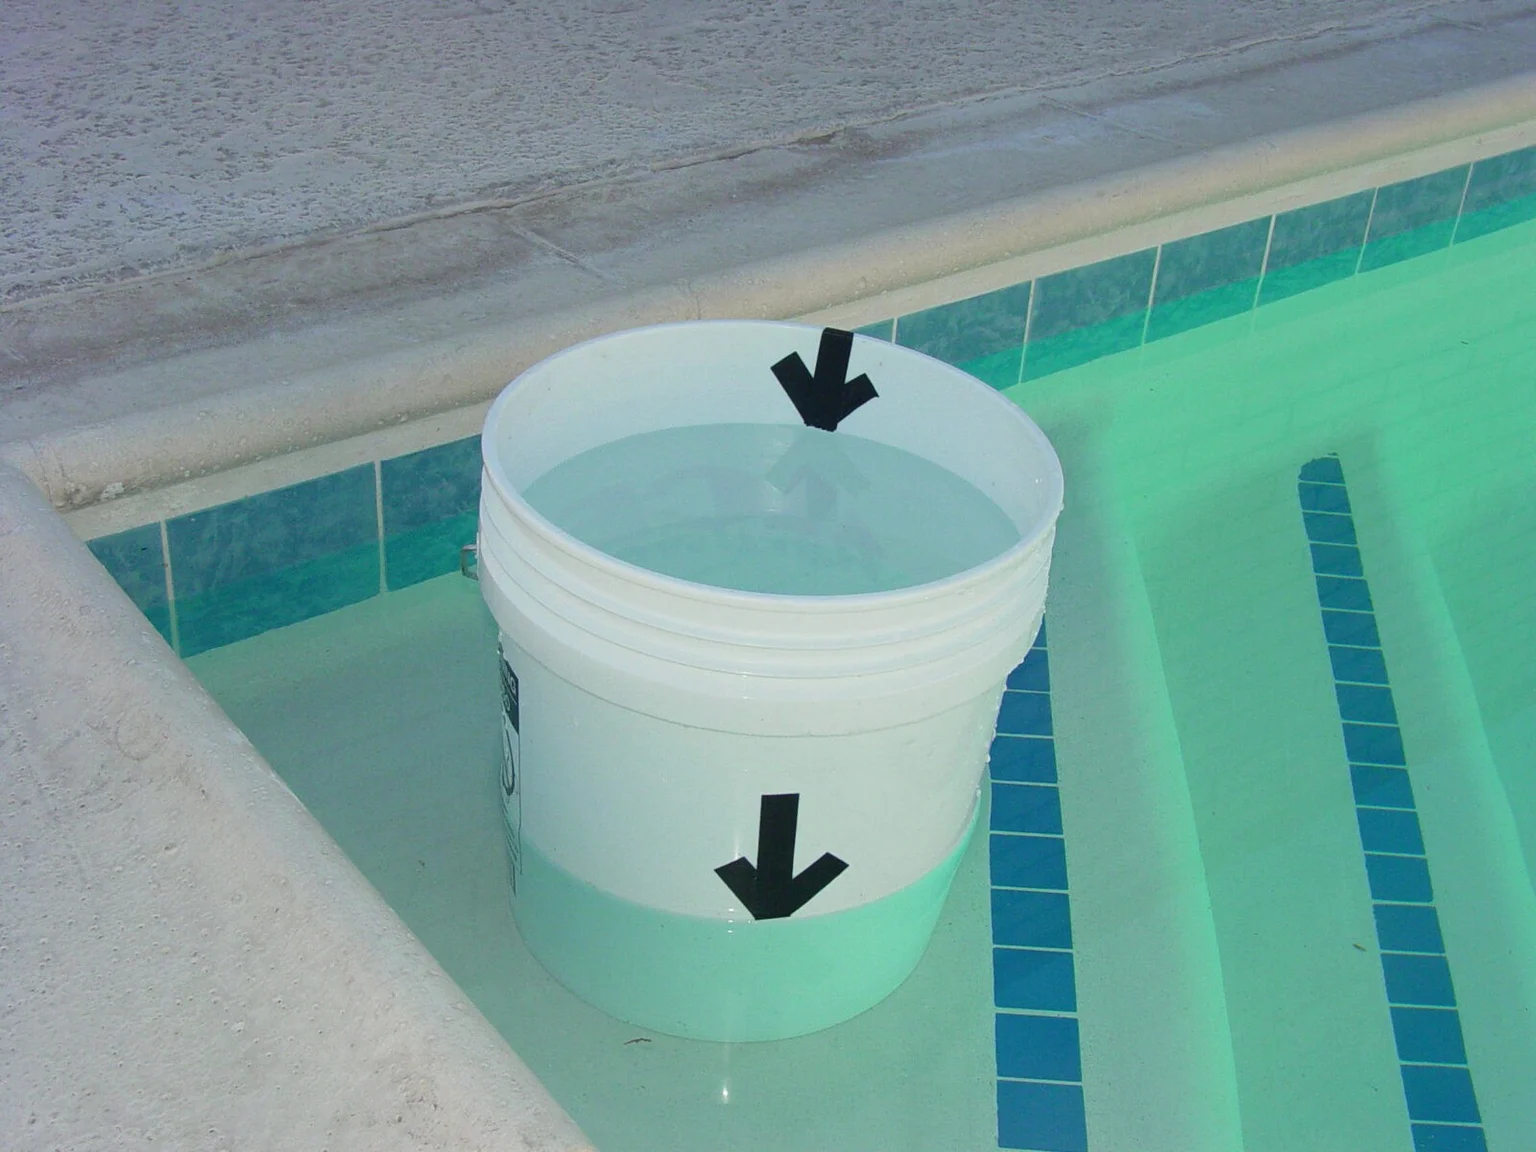
- Bring the pool to its normal water level. Fill an intact bucket with pool water to about one inch below its rim.
- Stand it securely on a submerged step with the rim above the pool water. Keep it from tipping or floating.
- With the water still, mark the level inside the bucket and the pool level on its outside. The two starting heights do not need to match.
- Disable automatic filling and avoid adding water, swimming, backwashing, and splash-producing features. Keep the usual pump schedule and record it. Do not run equipment if the water drops below its safe operating level.
- After 24 hours, measure each drop from its own starting mark. If rain or other water changes interfere, repeat under stable conditions.
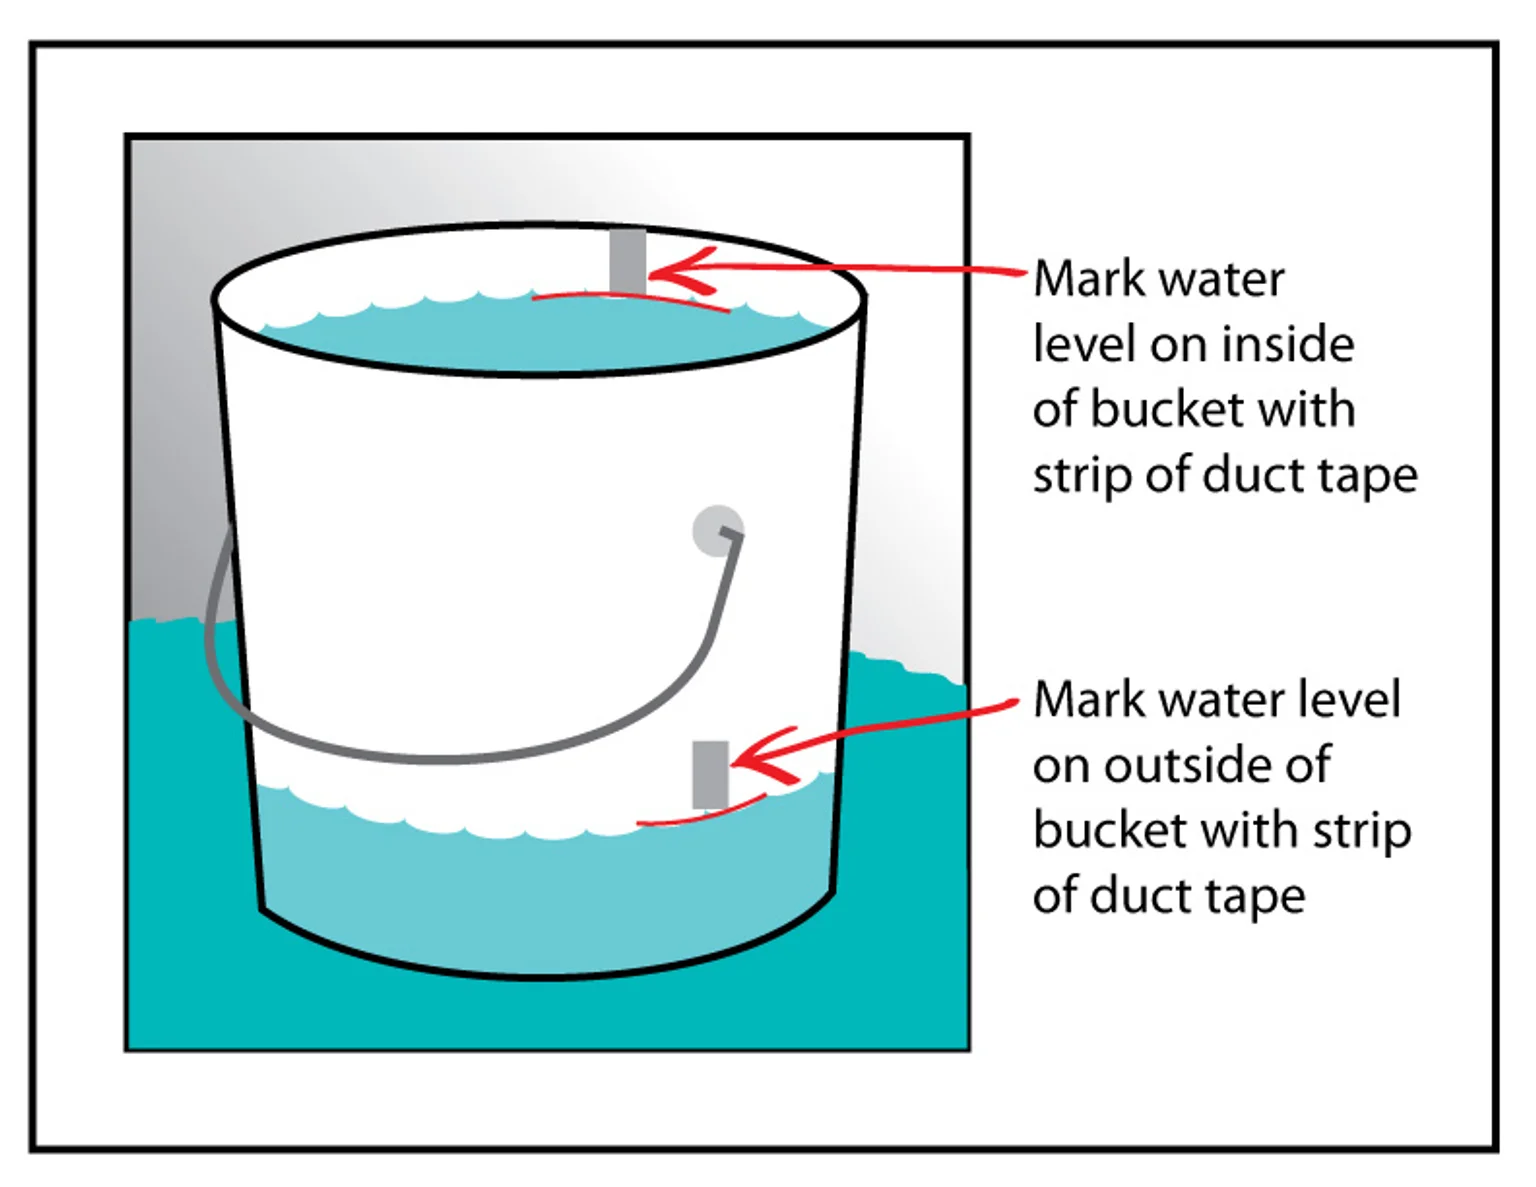
Similar drops suggest evaporation. A larger pool drop suggests additional water loss and warrants an assessment. A small or intermittent leak can escape this test. Record measurements and equipment timing for the technician; do not drain the pool to investigate.
Method reference: American Leak Detection bucket test.
More topping up deserves a closer look
Water level changes can reflect evaporation, splash-out, a refill device, or a leak. A quick glance cannot separate them reliably. Bring a record of what you have noticed: dates, approximate level changes, wet areas, and whether the pattern changes when equipment operates.
Define what the investigation covers
The shell, fittings, plumbing, and equipment are different parts of the system. Ask which checks are appropriate for your symptoms and what the quoted diagnostic visit includes. Further testing or opening an area for repair may be a separate step.
Get findings before choosing a cosmetic fix
A new interior finish is not a substitute for locating a leak. If water loss is unresolved, complete the necessary investigation before resurfacing or new deck work makes access more difficult. Ask for a clear explanation of the suspected location, supporting findings, and recommended repair.
Plan the repair and the restoration
If access requires cutting into decking or removing tile, include restoration in the discussion. Decide how matching materials will be handled and what happens if an exact match is unavailable. The goal is to understand the whole job before authorizing demolition.
Leave draining and equipment changes to the professional handling the assessment. Request a water-loss review with the pool’s symptoms and your city. Our renovation planning guide explains how diagnostic work fits ahead of finish selection.
A closer look at the estimate
Record when the water level changes, whether the equipment is running, and whether an autofill is active. Share recent bills and repair history. Follow professional instructions before changing equipment operation or water level.
Clarify whether the assessment includes visible equipment, plumbing tests, fittings, and the shell, and what written findings you will receive. Agree on authorization for further testing and separate pricing for repairs.
Scope to confirm before approving work
Request explicit line items for diagnostic scope, access, findings, proposed repairs, exclusions, and a way to verify the result. Keep optional upgrades separate from necessary repair work. Put water-provider confirmation, refill responsibility, and any startup coordination alongside the construction scope.
Use the budget planner to compare included items, quantities, and allowances.
Planning information compiled from the linked public resources and project-scope guidance. Examples are illustrative. Product instructions and the assessment of your property determine the final work. About this site.